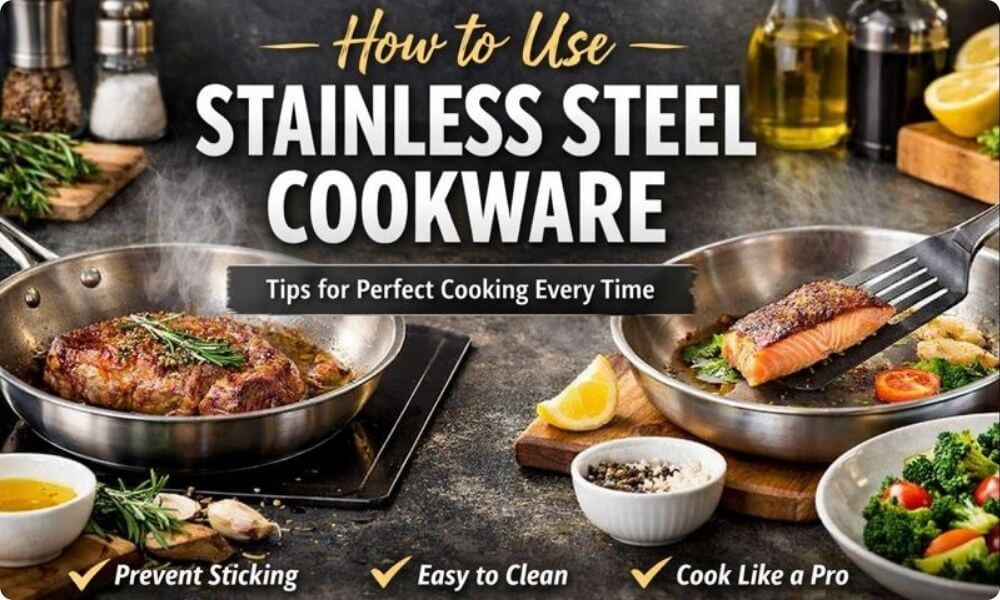
How to Use Stainless Steel Cookware (A Complete Beginner’s Guide)
Stainless steel cookware is a favorite in many kitchens, but it can feel tricky for beginners. Food sometimes sticks, and it can be confusing to know how much heat or oil to use. Don’t worry — this is completely normal, and sticking is almost always a technique issue rather than a problem with your pan.
By the end of this guide, you’ll know exactly how to preheat your pan, use the right amount of oil, adjust heat, and cook eggs, meat, vegetables, and fish without sticking. You’ll also learn simple cleaning and maintenance tips to keep your pans looking and performing like new.
This post will teach you step by step how to use stainless steel cookware with confidence, so every meal comes out perfectly cooked and easy to handle.
Why Stainless Steel Cookware Works Differently
Here’s a short, simple explanation you can drop into your post. It’s written for readers with no prior knowledge—no jargon, just clear reasons and practical tips.
How stainless steel conducts and holds heat
Stainless steel is a solid, heavy metal. When you heat a stainless steel pan, the metal warms up evenly and keeps that heat for a while. That steady heat helps you brown food and cook evenly, but it also means the pan can stay hotter than you expect if you turn the stove down too slowly.
Quick idea: think of the pan like a frying griddle — once it’s hot, it stays hot.
Why it doesn’t behave like nonstick pans
Nonstick pans have a smooth coating that keeps food from grabbing onto the surface. Stainless steel has no slippery coating. That means food can stick unless you use the right heat and fat. Stainless steel gives better browning and lasts longer than most nonstick coatings, but you have to use a slightly different technique.
The role of surface, bonding, and heat
When food hits a hot stainless steel surface, proteins (from meat or eggs) and sugars begin to change and form a crust. If the pan is too cool or there isn’t enough oil, those proteins can bond to the metal and stick. If the pan is hot enough and there’s a thin layer of oil, the food forms a crust that actually releases from the pan naturally.
Simple rule: the right heat + a bit of oil = a natural release.
A simple explanation of why food sticks
Food sticks when one or more of these things happen:
- The pan wasn’t hot enough before the food went in.
- You added oil at the wrong time (too early or not enough).
- You try to move the food before it’s formed its crust.
- The pan is overcrowded and steam prevents browning.
The Most Common Mistakes Beginners Make (and How to Fix Them)
Use this short, friendly section to show readers you get their frustrations — and give them simple, practical fixes.
1. Cooking on the wrong heat level
What goes wrong: Too hot = burning on the outside and raw inside. Too cool = food sticks and doesn’t brown.
Fix: Most cooking with stainless steel works best on medium heat. Use low heat for gentle warming or sauces and high heat only for quick sears. If your stove runs hot, try slightly lower than you think.
Quick example: For chicken breasts, start on medium-high to brown, then drop to medium to finish cooking.
2. Adding oil too early
What goes wrong: If you put oil in a cold pan, it just soaks into the surface and won’t protect food. If you add oil and immediately add food before the oil heats, sticking happens.
Fix: Heat the pan first. When it’s warm, add the oil and let it heat for a few seconds until it moves easily across the surface. Then add your food.
Tip: A small water drop should sizzle and dance when the pan is ready—then add oil.
3. Moving food too soon
What goes wrong: Trying to flip or stir food before it’s ready tears it and makes it stick.
Fix: Let food form a crust. For meats and many vegetables, the food will naturally release from the pan when the crust is ready. If it resists, leave it a bit longer.
Quick example: When searing a steak, don’t force a flip. Wait until it releases easily.
4. Overcrowding the pan
What goes wrong: Too much food drops the pan’s temperature and creates steam. Instead of browning, food steams and sticks.
Fix: Cook in batches so items have space. Pieces should not touch too closely. If you have a lot to cook, keep the finished food warm in a low oven and finish the rest in the pan.
Tip: Better to do two quick batches than one crowded, soggy pan.
5. Skipping proper cleaning
What goes wrong: Leftover burnt bits and grease build up, making future sticking worse and the pan harder to clean.
Fix: Clean pans soon after use (once cooled a bit). Soak if needed, use a soft scrub pad and mild detergent, and remove burnt marks with a paste of baking soda and water or by simmering water and vinegar. Avoid harsh scrubbing that damages the finish.
Tip: Wipe the pan dry and heat briefly after cleaning to remove any water spots.
How to Preheat Stainless Steel Cookware Properly
Why preheating matters
Preheating a stainless steel pan makes cooking easier. A hot pan:
- Helps food brown evenly.
- Reduces sticking because food forms a crust and releases.
- Prevents sudden temperature changes that can make food tear or burn.
Think of preheating as warming the road before driving — it makes everything go more smoothly.
Step-by-step preheating method (easy to follow)
- Start with a clean, dry pan. Put the empty pan on the burner.
- Use medium heat to begin. Medium works for most cooking; only go higher for quick sears.
- Give the pan a short moment to warm. On most stoves this is 1–2 minutes — you want the pan warm, not smoking.
- Test the heat (see the water-droplet test below). If the test looks right, you’re ready for oil.
- Add a small amount of oil, tilt the pan so the oil spreads into a thin layer, and let the oil heat for a few seconds until it moves easily across the surface.
- Add your food. Place food in the pan and don’t move it right away — wait for it to release naturally.
The water-droplet test (simple and reliable)
- Flick a tiny drop of water into the pan.
- If the drop sits and skitters around like a little ball, the pan is hot enough. That’s the ideal sign.
- If the drop evaporates instantly into steam or the pan smokes, it’s too hot — lower the heat and let it cool a bit.
- If the drop just sits and doesn’t move, the pan isn’t hot enough yet — give it a few more seconds.
This quick trick tells you when the pan and metal are at the right temperature.
When the pan is ready for oil
- Do the water-droplet test first. When the water skitters, the pan is ready.
- Add a small amount of oil and watch it: the oil should spread into a thin layer and start to shimmer or move easily.
- If the oil smokes right away, the pan is too hot — turn the heat down and let it cool a little before trying again.
- Use just enough oil to coat the bottom. Too much oil won’t help and too little can cause sticking.
How Much Oil or Fat Should You Use?
Use this clear, simple section in your post. It tells readers exactly what to do — which fats to pick, when to add them, and how much to use — without any confusing language.
Best oils for stainless steel cookware
- Everyday, medium-heat: light olive oil or canola oil — they work well for most cooking.
- Higher-heat searing: avocado oil, peanut oil, or refined vegetable oil — these handle more heat without burning.
- For flavor and low-to-medium heat: butter adds great taste, but it browns and can burn faster. Use it with lower heat or mix a little oil with butter.
- If you want the flavor of butter but less burning: use clarified butter (ghee) — it behaves more like oil at higher heat.
When to add oil
- Preheat the pan first. Heat the empty pan until it’s warm (use the water-drop test if you like).
- Add the oil after the pan is warm. Pour a small amount and tilt or swirl the pan so the bottom gets a thin coat.
- Let the oil warm for a few seconds until it moves or shimmers, then add your food.
Always: preheat → oil → food.
Butter vs oil — quick, simple differences
- Butter: tastes great, browns food beautifully, but burns at lower heat because of milk solids. Use on low–medium heat or mix with oil.
- Oil: better for medium–high heat and searing. Neutral oils (canola, avocado) won’t overpower flavors.
- Clarified butter (ghee): keeps butter flavor but can go hotter without burning.
How much oil to use (easy rules)
- Small pan / eggs: ~1–2 teaspoons (just enough to coat the bottom).
- Medium pan (10–12 inch) / sautéing veggies: ~1 tablespoon.
- Large pan / pan-frying or searing meat: 1–2 tablespoons (enough to lightly coat the surface).
- When in doubt: start with less — you can always add a little more.
Why too much or too little oil causes problems
- Too little oil: food can stick because there’s not enough barrier between food and metal. Browning is uneven and clean-up is harder.
- Too much oil: food can become greasy, won’t brown properly, and you’ll get more splatter. Large amounts of oil can also hide proper browning and ruin texture.
Best Heat Settings for Stainless Steel Cookware
This section explains heat in a simple, practical way so beginners know exactly what to do.
Low, medium, and high heat — explained simply
Low heat: Use low heat for gentle cooking. This is best for warming food, melting butter, making sauces, or keeping food from burning. Low heat gives you more control but cooks slowly.
Medium heat: Medium heat is the most useful setting for stainless steel cookware. It’s hot enough to cook food evenly and create light browning without burning. Most everyday cooking happens here.
High heat: High heat is for quick tasks like searing steak or boiling water. Stainless steel holds heat well, so high heat can quickly become too hot if you’re not careful.
Simple rule: If food burns fast, lower the heat. If food sticks and doesn’t brown, the heat may be too low.
Why medium heat works best most of the time
Stainless steel heats up and stays hot. Medium heat gives you enough warmth to cook food properly without scorching it. It also gives food time to form a crust, which helps it release from the pan instead of sticking.
For beginners, medium heat is safer and more forgiving than high heat.
Adjusting heat while cooking
Heat control doesn’t stop once cooking starts.
- If food is browning too quickly, turn the heat down slightly.
- If food looks pale and watery, turn the heat up a little.
- After searing meat, lower the heat to finish cooking without burning.
- If oil starts smoking, remove the pan from the burner for a few seconds, then lower the heat.
Stainless steel responds quickly, so small changes make a big difference.
Differences between gas, electric, and induction stoves
Gas stoves: Heat changes fast. When you turn the knob, the flame changes right away. You may need slightly lower settings because gas can be very hot.
Electric stoves: Heat changes slowly. The burner stays hot even after you turn it down, so adjust heat earlier than you think you need to.
Induction stoves: Heat is fast and strong. Pans heat quickly and evenly, but it’s easy to overheat. Start at a lower setting than usual and increase slowly.
Tip: No matter the stove type, start lower than you think and adjust up. You can always add heat, but it’s harder to fix burnt food.
How to Cook Common Foods Without Sticking
Use these simple, step-by-step tips for eggs, meat, vegetables, and fish so your food releases easily and browns nicely. No fancy steps — just what to do and when.
Cooking Eggs in Stainless Steel Pans
Step-by-step method (for fried eggs)
- Start with a clean, dry pan and warm it on medium heat for 1–2 minutes.
- Add 1–2 teaspoons of oil or a small knob of butter and let it warm until it moves easily.
- Crack the egg into a small bowl, then slide it into the pan.
- Let the egg cook without touching it. When the white around the edges is set and the egg pulls away easily, it’s ready to flip or serve.
- If you like over-easy, flip gently and cook for 15–30 seconds more.
Step-by-step method (for scrambled eggs)
- Beat eggs in a bowl with a little salt.
- Heat pan on low–medium and add 1 teaspoon of butter or oil.
- Pour eggs in and let them sit for a few seconds, then gently stir with a spatula.
- Fold and push the eggs slowly until just set — remove from the pan before they look fully dry.
Ideal heat level
- Fried eggs: Medium.
- Scrambled eggs: Low–medium (gentle heat prevents sticking and overcooking).
Oil and timing tips
- Always heat the pan first, then add oil.
- Use enough fat so the egg has a thin coating under it — not a pool, but enough to glide.
- If eggs stick, lower the heat and try again; adding a little more oil helps.
Cooking Chicken, Steak, and Meat
How browning works (simple)
Browning happens when the surface of meat gets hot enough to form a crust. That crust helps the meat release from the pan and gives flavor.
Step-by-step for searing meat (steak or chicken breast)
- Pat the meat dry with paper towels and season. Dry meat browns better.
- Preheat the pan on medium-high. Add 1 tablespoon of oil for a medium pan and let it heat.
- Place meat in the pan and do not move it. Let it form a crust — 2–4 minutes depending on thickness.
- When the meat lifts easily, flip and finish cooking on the other side.
- Let meat rest for a few minutes before cutting so juices stay inside.
When meat releases naturally
- The meat will release when a brown crust has formed. If it resists, give it more time. For thicker cuts, you may sear both sides then finish in a low oven.
Avoiding tearing and sticking
- Don’t flip or press meat too soon.
- Use tongs or a thin spatula and lift gently.
- Keep pieces spaced so heat circulates — don’t crowd the pan.
Cooking Vegetables and Fish
Preventing sogginess (vegetables)
- Cut vegetables to similar sizes so they cook evenly.
- Dry them well — wet veggies steam instead of brown.
- Use medium–high heat so the surface chars quickly and stays crisp.
Proper spacing
- Leave gaps between pieces. If the pan is crowded, the food will steam and get soggy.
- Cook in batches for large amounts and keep finished batches warm in a low oven.
When to flip or stir (vegetables)
- Let vegetables sit until the bottom shows a golden-brown color, then turn or toss.
- Stir or flip only a few times; constant stirring cools the pan and prevents browning.
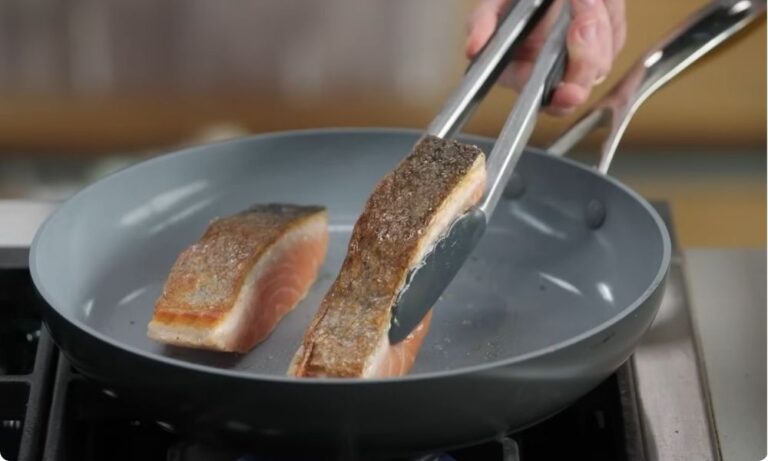
Cooking fish without sticking
- Pat fish dry and season. Skin-on fillets work well.
- Heat pan to medium-high and add a thin coat of oil.
- Place fish skin-side down and press lightly for the first 10–15 seconds to keep contact.
- Leave it alone until the skin is crispy and the fish releases — then flip once and finish quickly.
- For delicate fillets, use a wide spatula and flip gently.
When to flip or stir (fish)
- Flip fish only once if possible. It’s ready when the bottom turns golden and the fish comes away from the pan easily.
How to Know When Food Is Ready to Flip
Flipping food at the right time is key to cooking with stainless steel cookware. Knowing the signs ensures your food releases easily, browns beautifully, and keeps its juices.
Visual Signs
One of the easiest ways to tell if food is ready to flip is by looking at it. The bottom should have a golden-brown color. Lighter foods like eggs or fish will have a gentle golden tint, while meats may develop a deeper brown crust.
You might also notice the edges starting to pull away from the pan. For thicker cuts of meat, small pools of juice will begin to rise toward the top, signaling that the inside is cooking properly.
Texture Cues
Touch and movement are another way to check. Gently nudge the food with a spatula or tongs. If it lifts easily without sticking, it’s ready. Foods that still cling to the pan need a little more time.
For meat, press lightly — a properly seared piece should feel firm on the outside but still springy. Vegetables and fish should have a crisp bottom before you turn them over; if the surface feels soft or wet, it’s not ready.
Why Patience Matters
Waiting for the right moment allows a natural crust to form. This crust prevents sticking and keeps food intact when you flip it. Rushing the process often leads to tearing, loss of juices, and uneven browning. Giving food the time to develop a proper sear also improves flavor and texture.
What Happens If You Flip Too Early
Flipping food too soon can cause it to stick and break apart. Eggs may tear, delicate fish fillets can fall apart, and meats may lose their juices. Early flipping also prevents proper browning, which affects both taste and appearance. Stuck food leaves residue in the pan, making cleanup harder and creating burnt bits that are difficult to remove.
How to Clean Stainless Steel Cookware Correctly
Proper cleaning keeps your stainless steel pans looking new and helps prevent sticking in future cooking. Knowing how and when to clean makes a big difference.
Cleaning While Warm vs. Cooled
It’s often easier to clean a pan while it’s still warm but not hot. Right after cooking, wipe out leftover oil or food scraps with a paper towel. Warm pans allow grease and light food residue to come off more easily.
For stuck-on food, let the pan cool slightly, then add warm water to loosen residues. Avoid pouring cold water into a very hot pan, as this can warp the metal over time.
Removing Stuck-On Food Safely
For stubborn bits that won’t come off, fill the pan with warm water and a drop of dish soap and let it soak for 15–20 minutes. Then use a soft sponge or nonabrasive scrub pad to gently remove the residue.
For tougher stains, sprinkle a little baking soda on the bottom, add a bit of water to make a paste, and scrub gently. Avoid scraping with metal utensils, which can scratch the surface.
Dealing with Discoloration and Burnt Marks
Discoloration or rainbow-like stains are normal and harmless. They usually happen when the pan gets very hot. You can remove them by simmering a mixture of water and a few tablespoons of white vinegar in the pan for a few minutes.
For more serious burnt marks, use a paste of baking soda and water, let it sit, then scrub gently. These methods restore the shine without damaging the pan.
What to Avoid
Never use steel wool, wire brushes, or harsh chemical cleaners on stainless steel cookware. These can scratch or damage the surface and make food more likely to stick in the future.
Stick to soft sponges, nonabrasive pads, and gentle cleaning agents like dish soap, baking soda, or vinegar.
How to Maintain Stainless Steel Cookware Long-Term
Taking a few simple steps every day will keep your stainless steel pans looking and performing like new for years. Maintenance is mostly about good habits and gentle care.
Daily Care Tips
After each use, wash your pans with warm water, mild dish soap, and a soft sponge or cloth. Wipe off food particles and oil so they don’t build up over time.
Avoid leaving water or food in the pan for long periods because this can cause spotting or mild discoloration. Dry the pan thoroughly with a soft towel to prevent water spots and keep the metal shiny.
Storage Best Practices
Store your stainless steel cookware in a dry area. If stacking pans, place a soft cloth, paper towel, or pan protector between them to prevent scratches.
Avoid tossing utensils or other metal objects inside the pan when storing. Keeping pans separate and cushioned preserves their smooth surface and prevents dents.
How Often Deep Cleaning Is Needed
Even with daily care, your pans may develop discoloration, stubborn stains, or minor burnt-on residue over time. Deep cleaning with a paste of baking soda and water or simmering water with vinegar can restore the shine.
Most cooks only need to do this every few months or when the pan starts looking dull. Regular daily cleaning usually keeps pans in good condition without frequent deep scrubbing.
Keeping Pans Looking New
To maintain that “like-new” shine, avoid harsh scrubbing tools such as steel wool or wire brushes. Use gentle sponges and natural cleaning agents. Occasionally polishing the pan with a soft cloth can restore luster.
By combining careful cleaning, thoughtful storage, and occasional deep cleaning, your stainless steel cookware will stay attractive and perform well for many years.
Expert Tips for Better Results
Even with the right heat, oil, and preheating, a few small habits can make cooking with stainless steel cookware much easier and more successful. These tips come from professional cooks and experienced home chefs, but anyone can use them.
Use Room-Temperature Ingredients
Cold ingredients can lower the pan’s temperature, which increases sticking. Let meat, eggs, or vegetables come to room temperature for a few minutes before cooking. This simple step helps food cook evenly and develop a nice crust.
Don’t Rush the Cooking Process
Patience is key with stainless steel. Once food is in the pan, avoid moving it too quickly. Wait for natural release cues — the food will lift easily when a crust forms. Rushing or constantly stirring can cause sticking and tearing.
Deglaze for Easy Cleanup and Flavor
After cooking meat or vegetables, the pan may have browned bits stuck to the bottom. Deglazing — pouring a little water, stock, or wine into the hot pan — loosens those bits and makes a quick sauce. Deglazing not only makes cleaning easier but also adds flavor to your dishes.
Let Cookware Cool Naturally
After cooking, don’t pour cold water into a very hot pan. Let it cool slightly before washing. Sudden temperature changes can warp stainless steel and make it harder to clean. Gentle washing preserves the pan and keeps it performing well for years.
Mind the Oil and Heat Combination
Even with the right pan, using the wrong heat or too little oil can cause sticking. Always preheat the pan, add a thin layer of oil, and adjust heat as needed. Medium heat works for most foods, while higher heat is only for searing or boiling.
Conclusion
Stainless steel cookware can seem tricky at first, but using the right techniques makes a big difference. Preheating the pan, adding oil at the right time, controlling heat, and knowing when to flip food are the key steps for success. Remember, food sticking is usually a matter of timing and technique, not a flaw in your pan.
With a little practice and patience, you’ll learn how to cook eggs, meat, vegetables, and more without frustration. The more you cook with stainless steel, the easier it becomes to get even browning, perfect crusts, and easy cleanup.
By following these simple steps and paying attention to heat, oil, and timing, you can master how to use stainless steel cookware and enjoy consistent, delicious results every time.
Frequently Asked Questions
Is stainless steel cookware good for beginners?
Yes. With the right heat, oil, and patience, beginners can cook successfully and learn techniques that work for many foods.
Why does food stick even when I use oil?
Food sticks if the pan isn’t hot enough, the oil wasn’t heated properly, or the food is moved too soon. Preheating and proper oil use prevent sticking.
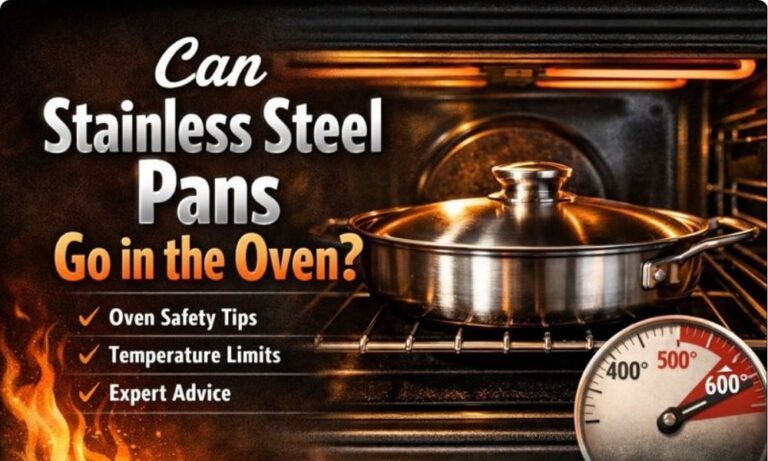
Can stainless steel pans go in the oven?
Most stainless steel pans are oven-safe, but check the manufacturer’s guidelines, especially for handles and lids.
Is stainless steel cookware safe for daily use?
Yes. Stainless steel is durable, non-reactive, and suitable for everyday cooking.
How long does stainless steel cookware last?
With proper care, stainless steel pans can last 10–20 years or more, often looking and performing like new.